
Hardwood · Color and design
How to Choose Hardwood for a Cohesive Open-Concept Home
Cohesion comes from intentional relationships—not necessarily one material forced into every room. Start with the longest sightlines, then coordinate direction, board scale, natural variation, light, transitions, and each room's real conditions.
The short answer
For a cohesive open plan, use one approved hardwood across connected dry living areas when the construction and site conditions allow it, or make each material change deliberate at a doorway or architectural line. Establish a main plank direction, review how it works through every opening, and judge multiple boards under the room's daylight. Plan transitions, cabinets, stairs, floor heights, and moisture-prone areas before ordering.
What matters most
- Map the full route of the floor before choosing direction in one favorite room.
- Continuous appearance does not remove the need for product-required breaks, expansion space, or transitions.
- Natural variation needs a blending plan across the whole open area, not room-by-room leftovers.
- Matching indoor and outdoor colors can create a visual connection, but indoor hardwood is not automatically exterior-rated.
Design from the door inward
Mark the views that connect the home
Stand at the main entrance, kitchen, seating area, hall openings, and any large doors or windows. Note where you see two or more rooms at once, where a flooring edge would be visible, and which walls or islands create natural stopping lines. A quick scaled sketch with door widths and adjoining floor heights is more useful than designing each room separately.
Also list the use and conditions of every connected space. A kitchen may need more spill planning than a dining room; a sunroom may have large temperature swings; a mudroom may receive wet grit. The exact hardwood must be approved for all areas where continuity is proposed. If one room is unsuitable, a planned material change can look more considered than stretching hardwood beyond its instructions.
Create a stable visual path
Choose plank direction and width across the whole footprint
A common starting point is the home's longest visual line or the path of entry, but structural and installation requirements come first. Joist direction, subfloor, board construction, fastening method, room geometry, and manufacturer guidance can limit the layout. Review the direction through halls, narrow passages, islands, fireplaces, and irregular walls before cutting the first board.
Wider boards reduce the number of seams and can create a calmer field, while narrower boards create a busier rhythm and may relate naturally to existing traditional woodwork. Neither width automatically makes every room look larger. Lay multiple full boards on the floor so you can judge their scale from across the connected space.
Herringbone, borders, and direction changes can define a zone, but they increase layout decisions, cuts, and transitions. Use them because the architecture supports the feature, not simply because a small sample looks interesting.
See the complete field
Balance tone, character, sheen, and changing daylight
Open plans often contain several light conditions at once. A floor can look warm beside kitchen cabinets, cooler near a north-facing window, and brighter beneath direct sun. Review several boards in every zone and at more than one time of day. Coordinate undertones with fixed materials, but do not expect natural wood to be a perfectly flat paint color.
Species, grade, stain, texture, and finish decide how much movement the floor shows. High-character boards can bring warmth and energy across a large field; lower-variation selections can feel quieter. Sheen changes reflections across long sightlines, and gloss tends to make dust, scratches, subfloor variation, and strong window reflections easier to see.
Plan the board blend across all cartons and rooms. Installing the quietest boards in one room and the most expressive boards in another can accidentally make a continuous product look like separate floors.
Continuity includes the edges
Plan floor-height changes, doorways, stairs, and fixed cabinets
A transition is not automatically a design failure. It can protect an expansion requirement, bridge different heights, finish a stair edge, or make a product change clear. Decide its material, width, color, and exact location before installation, particularly where a sightline runs through the opening.
Coordinate the flooring plan with cabinet installation, islands, appliances, doors, fireplaces, baseboards, and stairs. Floating floors often have different rules around fixed cabinetry than fastened or glued flooring; follow the exact manufacturer's directions. Finished height can affect dishwashers, exterior doors, stair risers, and adjoining tile.
| Decision | More continuous approach | Intentional-break approach |
|---|---|---|
| Material | One approved hardwood through compatible rooms | Change material where use or conditions change |
| Plank direction | One main direction through the connected footprint | Change at a clear architectural boundary with a planned detail |
| Color | Repeat one board blend throughout | Coordinate undertones without trying to fake an exact match |
| Room zones | Use furniture, rugs, and lighting to define them | Use a border, pattern, or material change where structure supports it |
| Doorways | Continue when the system and layout allow | Place the transition under a closed door or another deliberate line |
A Connecticut example
What a connected main-level installation looks like in practice
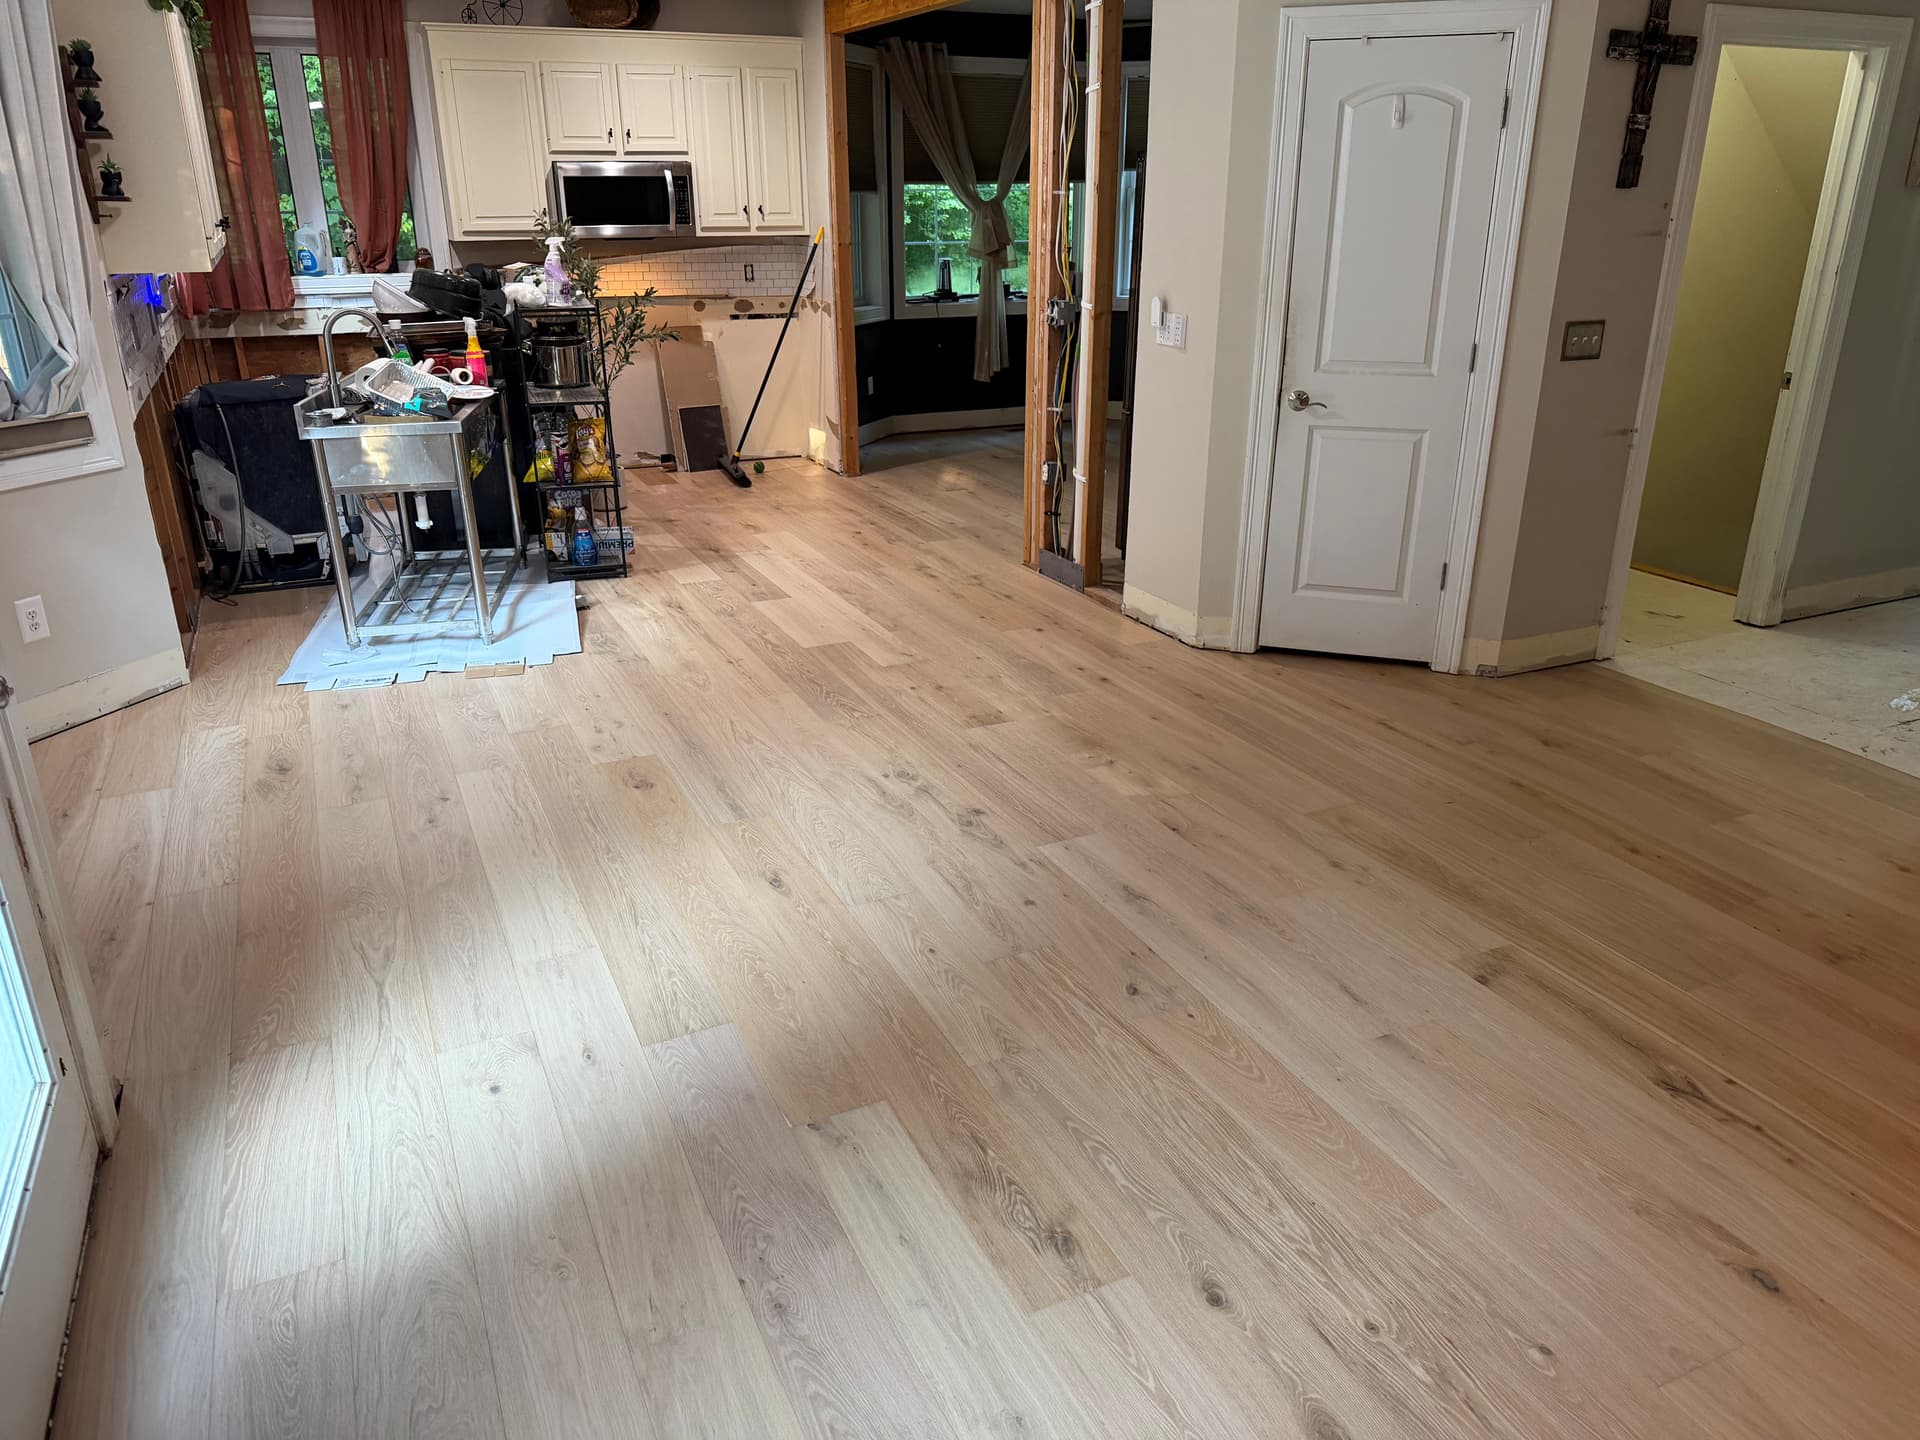
During an August 2026 Colchester restoration project, Floors Now glued down 947 square feet of Skyline Plank Wheatfield Oak engineered hardwood across a family room, kitchen, dining room, and living room. The single named product created continuity across the main living areas while reducer and matching quarter-round details were included in the scope.
That result depended on more than choosing the same color for four rooms. Product construction, an approved glue-down method, substrate readiness, room sequence, perimeter details, and the broader restoration schedule were coordinated as one project. Another home may need a different construction or a visible transition; the lesson is to plan the complete connected assembly.
Indoor-outdoor means visual relationship here
You can echo a deck, patio, landscape, or exterior wood tone through color, grain direction, and the view through glass. Do not carry indoor hardwood outdoors unless that exact product and full installation are expressly approved for exterior exposure.
Before the order
Walk the layout one last time
Place sample boards at the main viewpoints, mark proposed transitions with tape, and point to the plank direction in each room. Review which boards or natural features may be prominent, where end joints will turn through openings, and how edges meet tile, carpet, stairs, and exterior doors.
Technical fit
Exact product, room approval, subfloor, moisture, indoor climate, installation method, and expansion details are confirmed.
Visual fit
Multiple boards have been reviewed in kitchen light, living-area light, hallways, and major sightlines.
Construction sequence
Cabinets, painting, trim, appliance access, deliveries, and other trades are coordinated with the floor.
Future care
Entry protection, rug compatibility, sun exposure, cleaning, and leftover repair material have a plan.
Plain-language answers
Common questions
Should hardwood run in the same direction through every open room?
Often one direction creates a calm connected field, but structural requirements, board construction, fastening, room geometry, and manufacturer instructions come first. A planned direction change can work at a clear boundary; an improvised change in open view usually looks less intentional.
Can hardwood continue through a kitchen?
Many hardwood products are used in kitchens, but approval, spill risk, appliance details, cabinetry, site conditions, and care must be checked for the exact floor. Prompt spill response matters, and a floor covering does not waterproof the room or building assembly.
Do all connected rooms need exactly the same flooring?
No. Cohesion can come from coordinated undertones, repeated shapes, deliberate transition lines, and consistent trim. Change materials when room use or product limits call for it, and make the boundary part of the design.
Will wide-plank hardwood make an open plan look larger?
It may create a calmer field with fewer seams, but scale depends on room proportions, board length, color, layout, furniture, and sightlines. Review several actual boards across the space rather than relying on a universal design rule.
Checked, not guessed
Sources and technical review
Reviewed on September 11, 2026 by Floors Now! flooring team, Connecticut flooring sales and installation team. The sources below support the general guidance. The instructions, room approvals, cleaner list, installation guide, and warranty for the exact product you buy always take priority.
- National Wood Flooring Association: Types of Wood Floors
Explains solid and engineered construction, board formats, species, grade, and saw cut in consumer-friendly terms.
- National Wood Flooring Association: Wood Floor Finishes
Introduces common finish families and why finish choice should reflect the household's use.
- Somerset Hardwood Flooring: Engineered Hardwood Installation Guidelines
A manufacturer example of product-specific requirements for engineered hardwood, moisture, approved methods, and long-term room conditions.
Keep planning
Hardwood Product Guide
Compare the constructions and specifications behind the finished open-plan look.
articleChoose Species, Color, Grade, and Finish
Understand what creates natural variation and how to review samples accurately.
serviceTrim and Transitions
Plan reducers, stair noses, thresholds, baseboards, and edges before installation.
projectColchester Multi-Surface Restoration Project
See engineered hardwood connect four main-level rooms within a larger coordinated scope.