
Tile · Color and design
How to Mix Tile Patterns and Shapes Without Overwhelming the Room
Multiple tiles can make a room feel tailored, but every added pattern creates another alignment, cut, grout, and maintenance decision. A clear lead-and-support relationship keeps variety from becoming visual noise.
The short answer
Mix tile successfully by giving one surface the strongest pattern and using the others to support it through a shared color, finish, or shape. Change no more variables than the room needs: if one tile has strong color and movement, keep the neighboring tile and grout quieter. Draw every wall and floor to scale, center the most visible areas, preview edge cuts, and verify that each exact tile is approved for where it will be installed.
What matters most
- One lead pattern plus quieter supporting fields is easier to read than several surfaces competing at the same intensity.
- Repeat a color, proportion, or finish so different shapes feel related rather than accidental.
- Pattern planning includes outlets, niches, drains, corners, doors, cabinets, fixtures, transitions, and movement joints—not only the center of the field.
- A tile that works on a wall may not work on a floor or shower floor; choose by application before appearance.
Establish a hierarchy
Choose the lead tile and supporting tiles
The lead tile is the surface you want people to notice first. It might be a patterned powder-room floor, a shower feature wall, a kitchen backsplash, or a mosaic niche. Supporting tile creates space around that idea. It can repeat the lead tile's background color, use a quieter version of its texture, or shift scale while staying within the same palette.
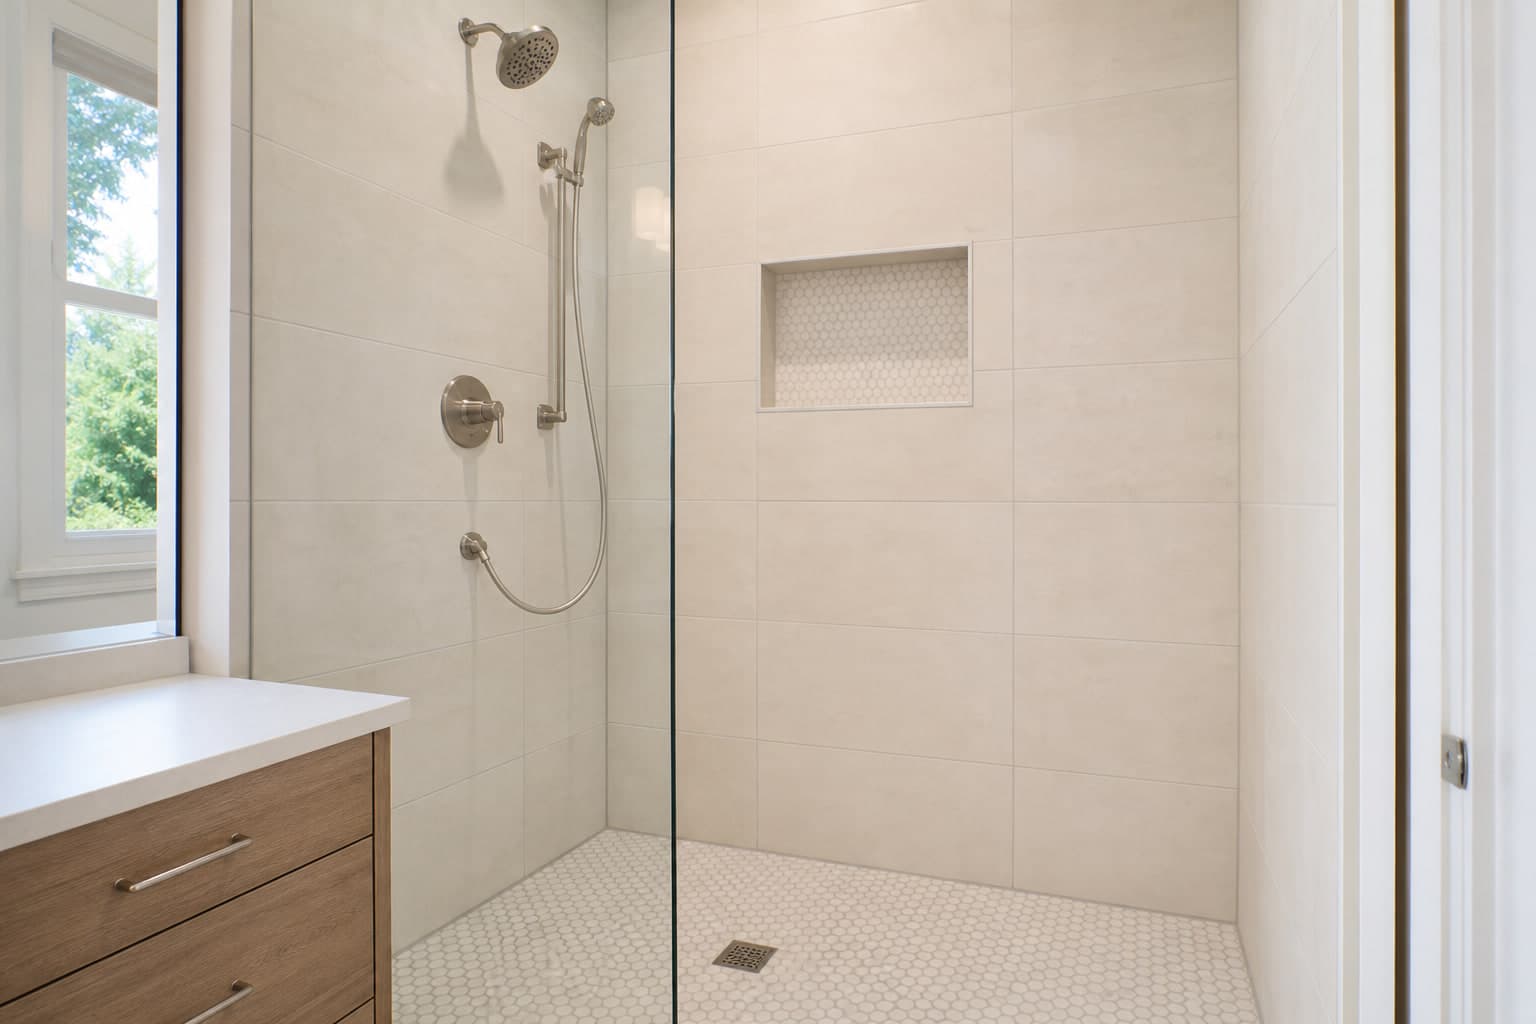
If every surface has high contrast, visible movement, a complex shape, and contrasting grout, the eye has no resting place. Reduce at least two of those variables on the supporting surfaces. For example, pair a multicolor patterned floor with simple wall tile and close-color grout, or pair a dramatic stone-look shower wall with a small one-color shower-floor mosaic selected for the exact application.
The one-sentence test
If you cannot explain which tile is the focal point and how the others support it in one sentence, edit the combination before laying out the room.
Give different tiles one thing in common
A shared element creates continuity. Pull one warm gray from the decorative tile into the field tile. Repeat a rectangle in different sizes. Carry a matte finish from the floor to a quiet wall tile. Align a niche with the field-tile joints. These connections are subtle, but they make a multi-tile room feel composed.
Color samples should be viewed together in the actual light because undertones shift beside cabinets, counters, plumbing finishes, and paint. Order representative tile samples rather than relying on screen images. Products with intentional shade variation need several pieces to reveal their true range; one sample can hide the lightest, darkest, or most active pieces.
| Lead surface | Support strategy | Detail to settle early |
|---|---|---|
| Patterned bathroom floor | Quiet wall tile that repeats one floor color | Where the floor pattern centers and how it ends at the door and walls |
| Veined shower wall | Small, simpler shower-floor tile in a related tone | Vein placement, corner flow, drain cuts, and shower-floor approval |
| Shaped kitchen backsplash | Plain counter and restrained grout contrast | Outlet cuts, top edge, cabinet ends, and where the pattern begins |
| Graphic niche or border | Calm field tile with aligned joints | Niche dimensions, shelf thickness, waterproofing, and trimmed edges |
Vary scale deliberately
Scale is the apparent size of the pattern, not just the tile dimensions. A 24-inch stone-look tile may contain broad veining that spans several pieces. A small hexagon creates a dense network of joints. A printed decorative tile may form a larger motif only after four pieces meet. Place enough pieces together to see the full repeat.
Contrasting scales often work better than nearly matching ones. A broad, quiet wall field can support a finer mosaic. Two medium-size patterns with similar visual weight may compete. On floors, also consider how size affects cuts, slope, and surface flatness. A design choice cannot override the exact product and system requirements.
Draw the pattern through the whole room
A pattern is not finished until its boundaries are drawn. Measure walls and floors, then mark doors, windows, vanities, toilets, tubs, showers, drains, niches, outlets, cabinet ends, and the most important viewing points. Decide where full or nearly full pieces matter most and where smaller cuts will be less noticeable. Real tile dimensions, joint widths, and expected variation belong in the drawing.
Some layouts use a repeating module or require tiles from multiple cartons to be blended. Directional tiles may need arrows followed or intentionally mixed. Long rectangular tiles can have slight shape variation that affects allowable offsets. Dry-lay representative pieces when practical and follow the tile maker's pattern instructions rather than forcing an inspiration photo onto a different product.
Straight grid
Makes lines and alignment clear; irregular walls and inconsistent joint width can become more visible.
Offset or brick layout
Adds movement, but the exact offset should respect the tile's shape and the maker's guidance, especially with longer pieces.
Herringbone or diagonal
Creates strong direction and more perimeter cuts; establish the axis, focal area, and ordered waste before setting.
Modular or printed pattern
Confirm the complete repeat, quantities by component, rotation rules, and how the motif terminates at every edge.
Use grout and edge details to finish the composition
Contrasting grout turns every joint into a line and magnifies the laying pattern. Close-color grout lets shape and shade variation read more gently. When two patterns meet, grout color can either connect them or make the boundary stronger. View cured sample sticks and, when possible, a small mockup; screens rarely predict the final contrast.
Plan exposed tile edges, outside corners, niches, changes of plane, baseboards, and adjoining floors before work begins. A metal profile, finished-edge tile, stone threshold, or another trim can become a deliberate frame. Changes of plane and other required movement locations need the correct flexible detail rather than rigid grout, even if continuous grout would look simpler in a rendering.
Give every surface its own technical approval
A multi-tile bathroom can include a main floor, shower floor, shower walls, dry walls, niche, curb, and threshold. Confirm every product for its specific job. Shower water is controlled by the approved system behind and beneath the tile, connected at corners, penetrations, drain, and transitions; visible tile and grout are the finish, not the waterproof barrier.
The prepared surface below the tile must be stable and sufficiently flat. Large pieces may reveal unevenness at adjacent edges, called lippage, while tiny mosaics can reveal humps or sheet boundaries. The installer, tile, setting materials, waterproofing, grout, and layout should be coordinated as one assembly.
Plain-language answers
Common questions
How many tile patterns can I use in one bathroom?
There is no fixed number, but one lead pattern plus one or two quiet supporting surfaces is a useful starting point. Room size matters less than clear visual hierarchy and well-planned boundaries.
Should shower floor tile match the bathroom floor?
It can share color or material character without being identical. The shower-floor tile must first suit the drain, slope, bare-foot use, wet conditions, and exact application rating.
Can I mix matte and glossy tile?
Yes, when the finishes support the design and each exact tile is approved for its location. Different finishes also show water, residue, scratches, and light differently, so view them together in the room.
Should all grout in the room be one color?
Not necessarily. One color can simplify the room, while carefully chosen different colors can help each tile read correctly. Confirm compatibility and make a written grout schedule so installers know what goes where.
Checked, not guessed
Sources and technical review
Reviewed on September 11, 2026 by Floors Now! flooring team, Connecticut flooring sales and installation team. The sources below support the general guidance. The instructions, room approvals, cleaner list, installation guide, and warranty for the exact product you buy always take priority.
- Tile Council of North America: Ceramic tile frequently asked questions
Industry guidance on tile selection, grout joints, layout, mortar coverage, surface flatness, movement joints, and other installation fundamentals.
- Tile Council of North America: Dynamic coefficient of friction frequently asked questions
Explains tile-use classifications, how wet-test results are used, and why one laboratory number cannot predict whether a person will slip in every real condition.
- MAPEI: Tile leveling and lippage systems
Technical explanation of preparation, large-format tile flatness requirements, lippage, and the limits of clip-and-wedge systems.
- Schluter Systems: Waterproof shower systems
System-manufacturer guidance showing that visible tile and grout are not the shower's waterproofing layer; the approved assembly behind them manages water.
Keep planning
Build a lasting tile design
Coordinate format, finish, pattern, grout, scale, edges, and room conditions.
productTile buyer's guide
Compare porcelain, ceramic, decorative, and wood-look directions before narrowing the exact product.
serviceShowers and tub surrounds
Plan visible tile with water management, layout, edges, niches, fixtures, and trade sequencing.
serviceBacksplash installation
Coordinate pattern, outlets, cabinet ends, grout, cuts, and finished edges in a focused feature area.
productBrowse tile ideas
Collect shapes and visual directions, then verify exact application and construction details.