How is a new floor installed over two layers of old vinyl?
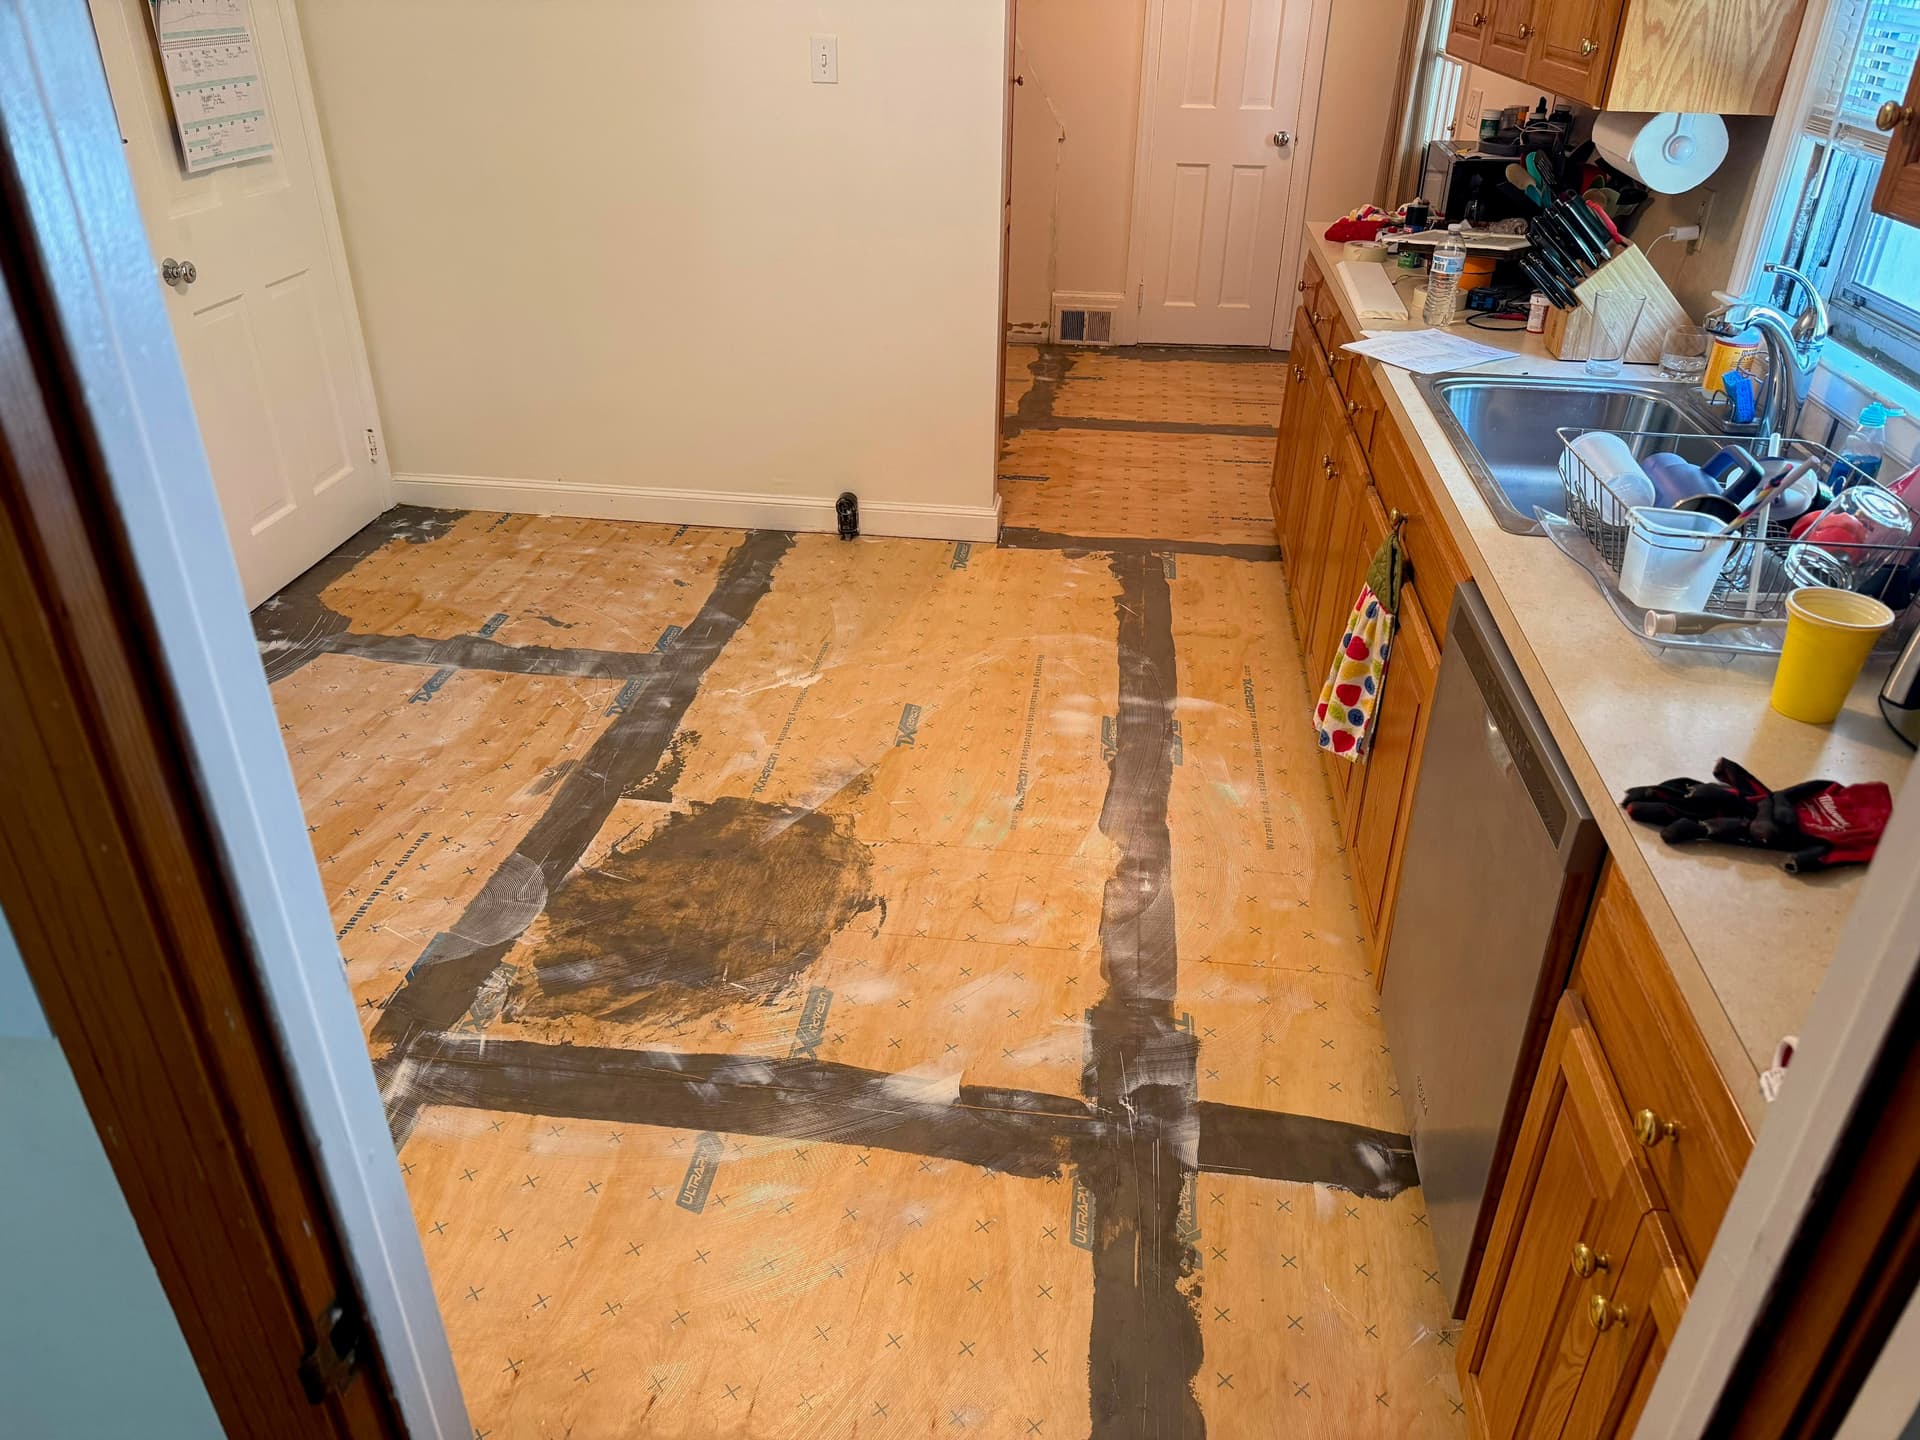
This West Hartford kitchen had two layers of existing vinyl — 324 square feet of old flooring stacked on old adhesive. Gluedown luxury vinyl tile bonds directly to the surface beneath it, so what it sticks to decides whether the new floor holds. Layers of old vinyl over old adhesive aren't a reliable base for an adhesive bond, so both layers had to come out before the new floor could go in.
After removing and disposing of both layers, the crew skim coated 162 square feet with Planiprep SC. A skim coat fills minor imperfections and creates a smooth, flat surface so the LVT adhesive bonds evenly and the tiles sit level — it's the step that turns a torn-up subfloor into an installation-ready one.
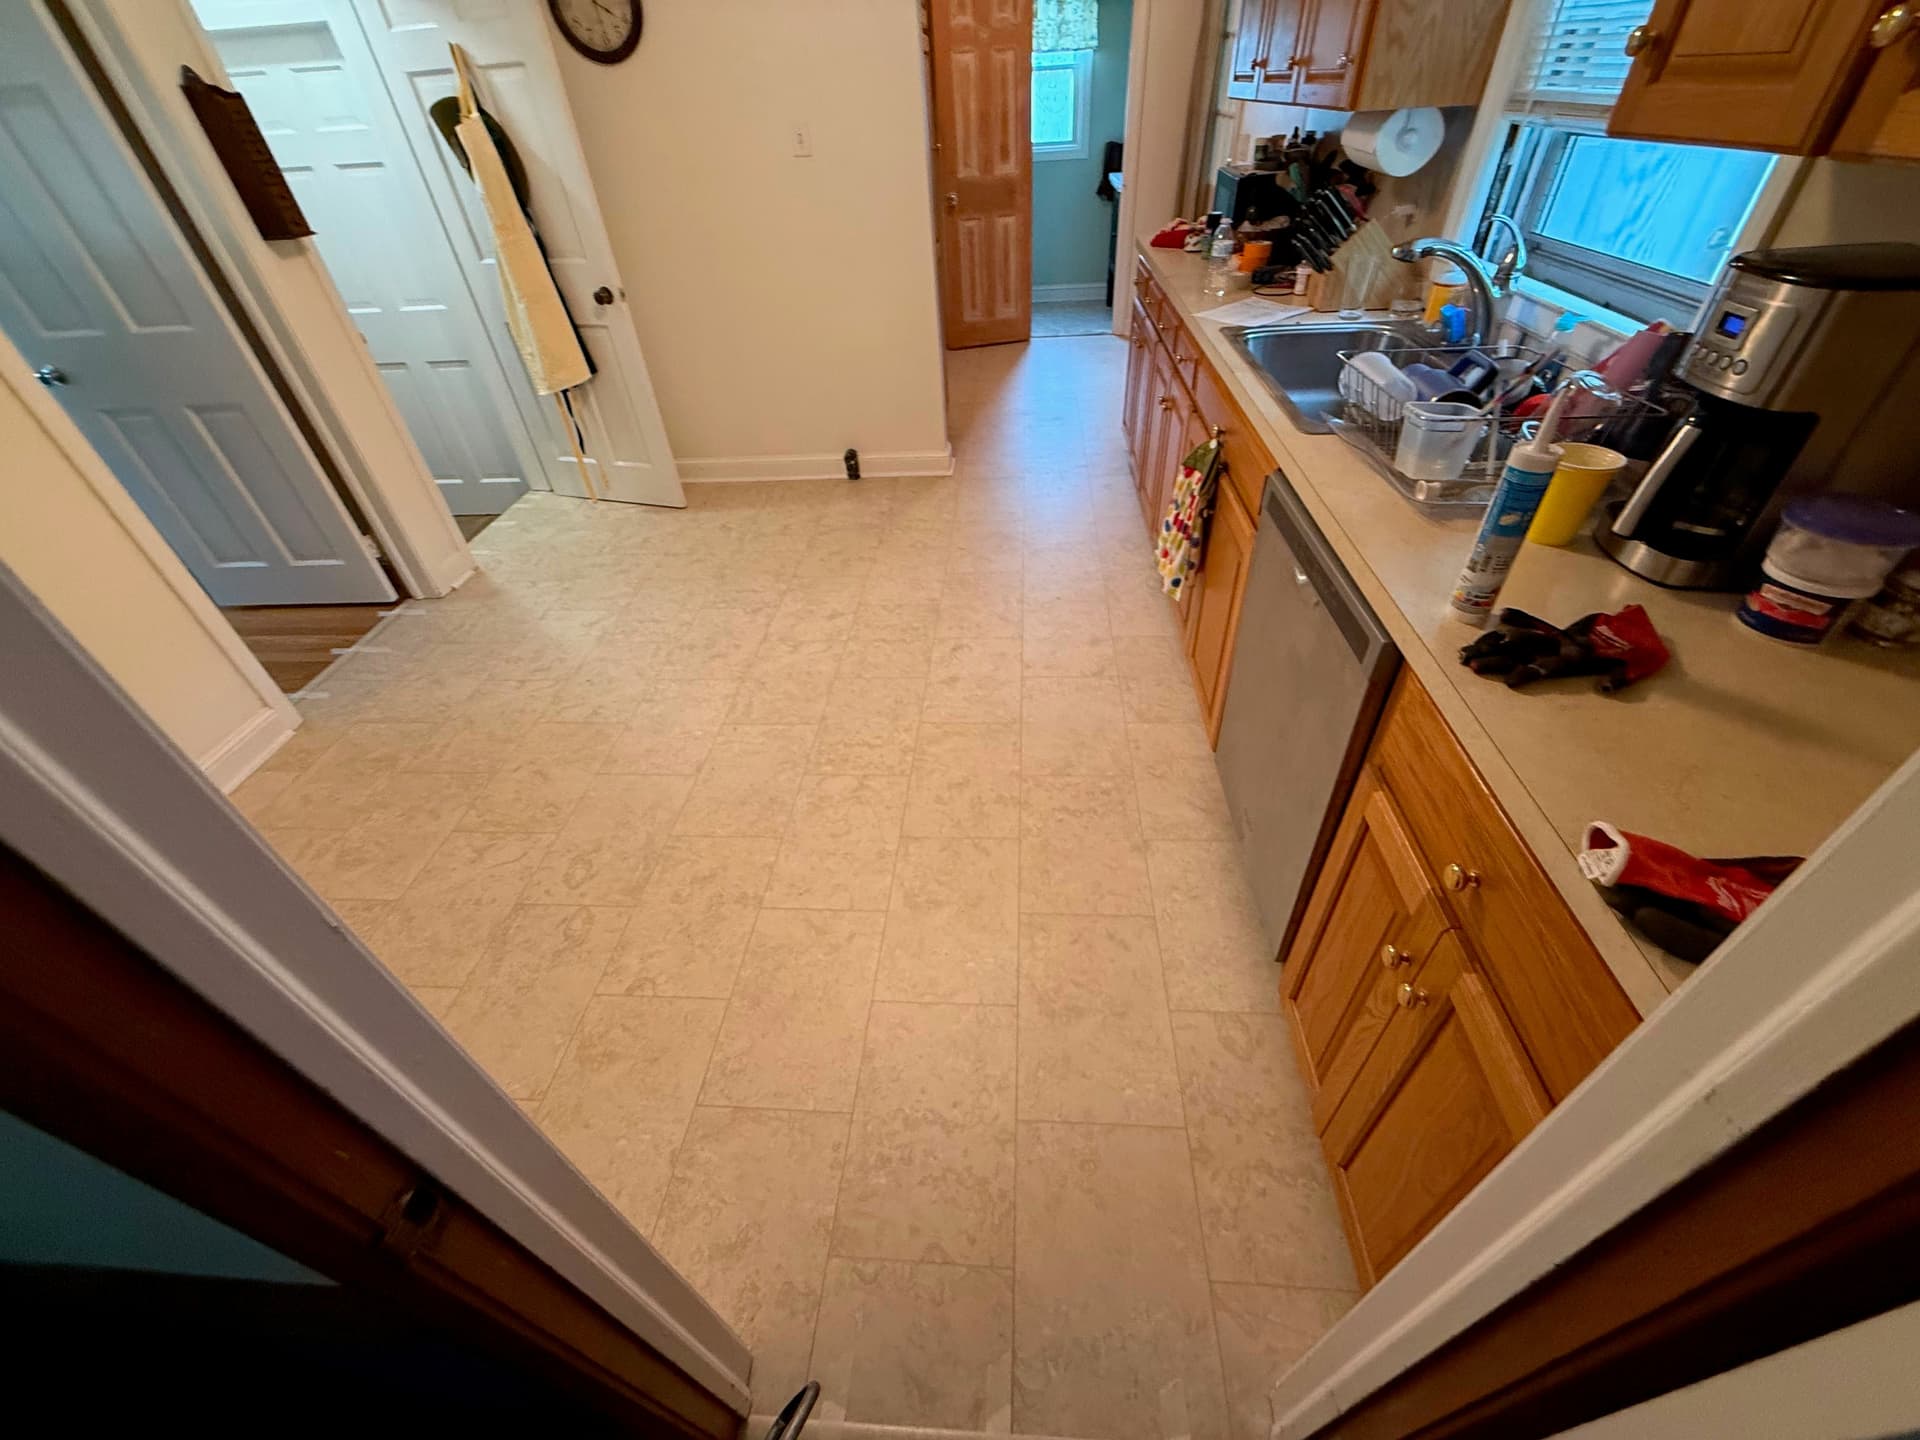
With the surface prepared, the decision was the look: Karndean Knight Tile Gluedown Natural Limestone ST33, with Cream 3 mm design strips set between the tiles to create the grout-line effect of real limestone tile. Removal, preparation, the gluedown installation, and all trim and transitions were completed in one workday.
Project overview
The goal, materials, and finished scope.
In August 2026, Floors Now completed a one-day kitchen flooring project in West Hartford. The crew removed and disposed of two existing vinyl layers totaling 324 square feet, then skim coated 162 square feet with Planiprep SC. The new floor used 179 installed square feet of Karndean Knight Tile Gluedown Natural Limestone ST33 with Cream DS23 3 mm design strips for a grout-line effect. LVT adhesive secured the floor, while two reducers, one stair nose, 8 linear feet of 4.25-inch primed colonial baseboard, 40 linear feet of primed quarter-round, and four cove-base pieces completed the verified trim and transition scope.
Project facts
Completed
August 2026
Documented scope
Residential kitchen gluedown LVT installation
Property type
Residential Home
Rooms
Kitchen
Flooring
Karndean Knight Tile Gluedown Natural Limestone ST33 luxury vinyl tile with Cream DS23 3 mm design strips
Project goal
Give the kitchen a brand-new, beautiful floor after removing two layers of existing vinyl
Project photography
The finished result.
Each image and caption identifies the portion of the verified project that is actually shown.
View 1.Preparation-stage view after two layers of existing vinyl were removed and before the new gluedown LVT was installed.
View 2.Completed Natural Limestone kitchen floor with Cream 3 mm design strips creating a grout-line effect.
Scope of work
What we did, step by step.
Two-layer removal and skim-coat preparation supported the one-day gluedown installation.
1Removed and disposed of two existing vinyl layers totaling 324 square feet
2Skim coated 162 square feet with Planiprep SC to prepare the installation surface
3Installed 179 square feet of Karndean Knight Tile Gluedown Natural Limestone ST33 with LVT adhesive
4Used Cream DS23 3 mm design strips to create a grout-line effect between the luxury vinyl tiles
5Completed the flooring edges with two reducers and one stair nose
6Installed 8 linear feet of 4.25-inch primed colonial baseboard, 40 linear feet of primed quarter-round, and four cove-base pieces
7Completed the removal, preparation, flooring, trim, and transition scope in one workday
Common questions
Questions homeowners ask about this kind of project.
Why remove both layers of old vinyl instead of installing over them?
Gluedown LVT bonds directly to what's underneath, so the base has to be sound. This kitchen had two vinyl layers totaling 324 square feet, and old vinyl over old adhesive isn't a surface we can trust an adhesive bond to. We removed and disposed of both layers, then prepared the surface properly.
What is a skim coat?
It's a thin layer of leveling compound spread over the prepared surface to fill minor imperfections and create a smooth, flat base for the adhesive. We skim coated 162 square feet with Planiprep SC before setting the gluedown tile.
How does luxury vinyl tile get a grout-line look?
With design strips. We set Cream 3 mm design strips between the Natural Limestone tiles, which reads as a grout line and gives the finished floor the appearance of real grouted stone tile.
Can removal, prep, and installation really finish in one day?
On this project, yes. The crew removed two vinyl layers, skim coated the surface, installed 179 square feet of gluedown LVT with LVT adhesive, and finished with two reducers, one stair nose, new baseboard, quarter-round, and cove base — all in one workday.
Products and planning
Planning a similar flooring project?
Use these resources to compare the materials, preparation, and installation services involved in this project.
Learn when Luxury Vinyl uses attached padding, separate underlayment, a moisture layer, adhesive, or no added layer—and why the product instructions decide.
Compare waterproof hardwood, Luxury Vinyl, laminate, tile, and other water-resistant flooring claims without confusing the floor with a watertight room.
Plan a project like this West Hartford installation
Tell us about your rooms, flooring, and project goals.
Share the location, rooms, existing floors, materials you are considering, known preparation needs, and timing. Floors Now will review the details and follow up about the most practical next step.